[WARNING] The instructions below should be used together with Power-user's latest version, and might not work for previous versions.
Power-user can be deployed centrally using Microsoft Intune. To package Power-user with Intune, follow the steps below:
- Before anything, contact us so to let us know you will be packaging Power-user, as there is a quick security check we will perform under 24h before your license key can be used for deployment.
- Connect to Intune.
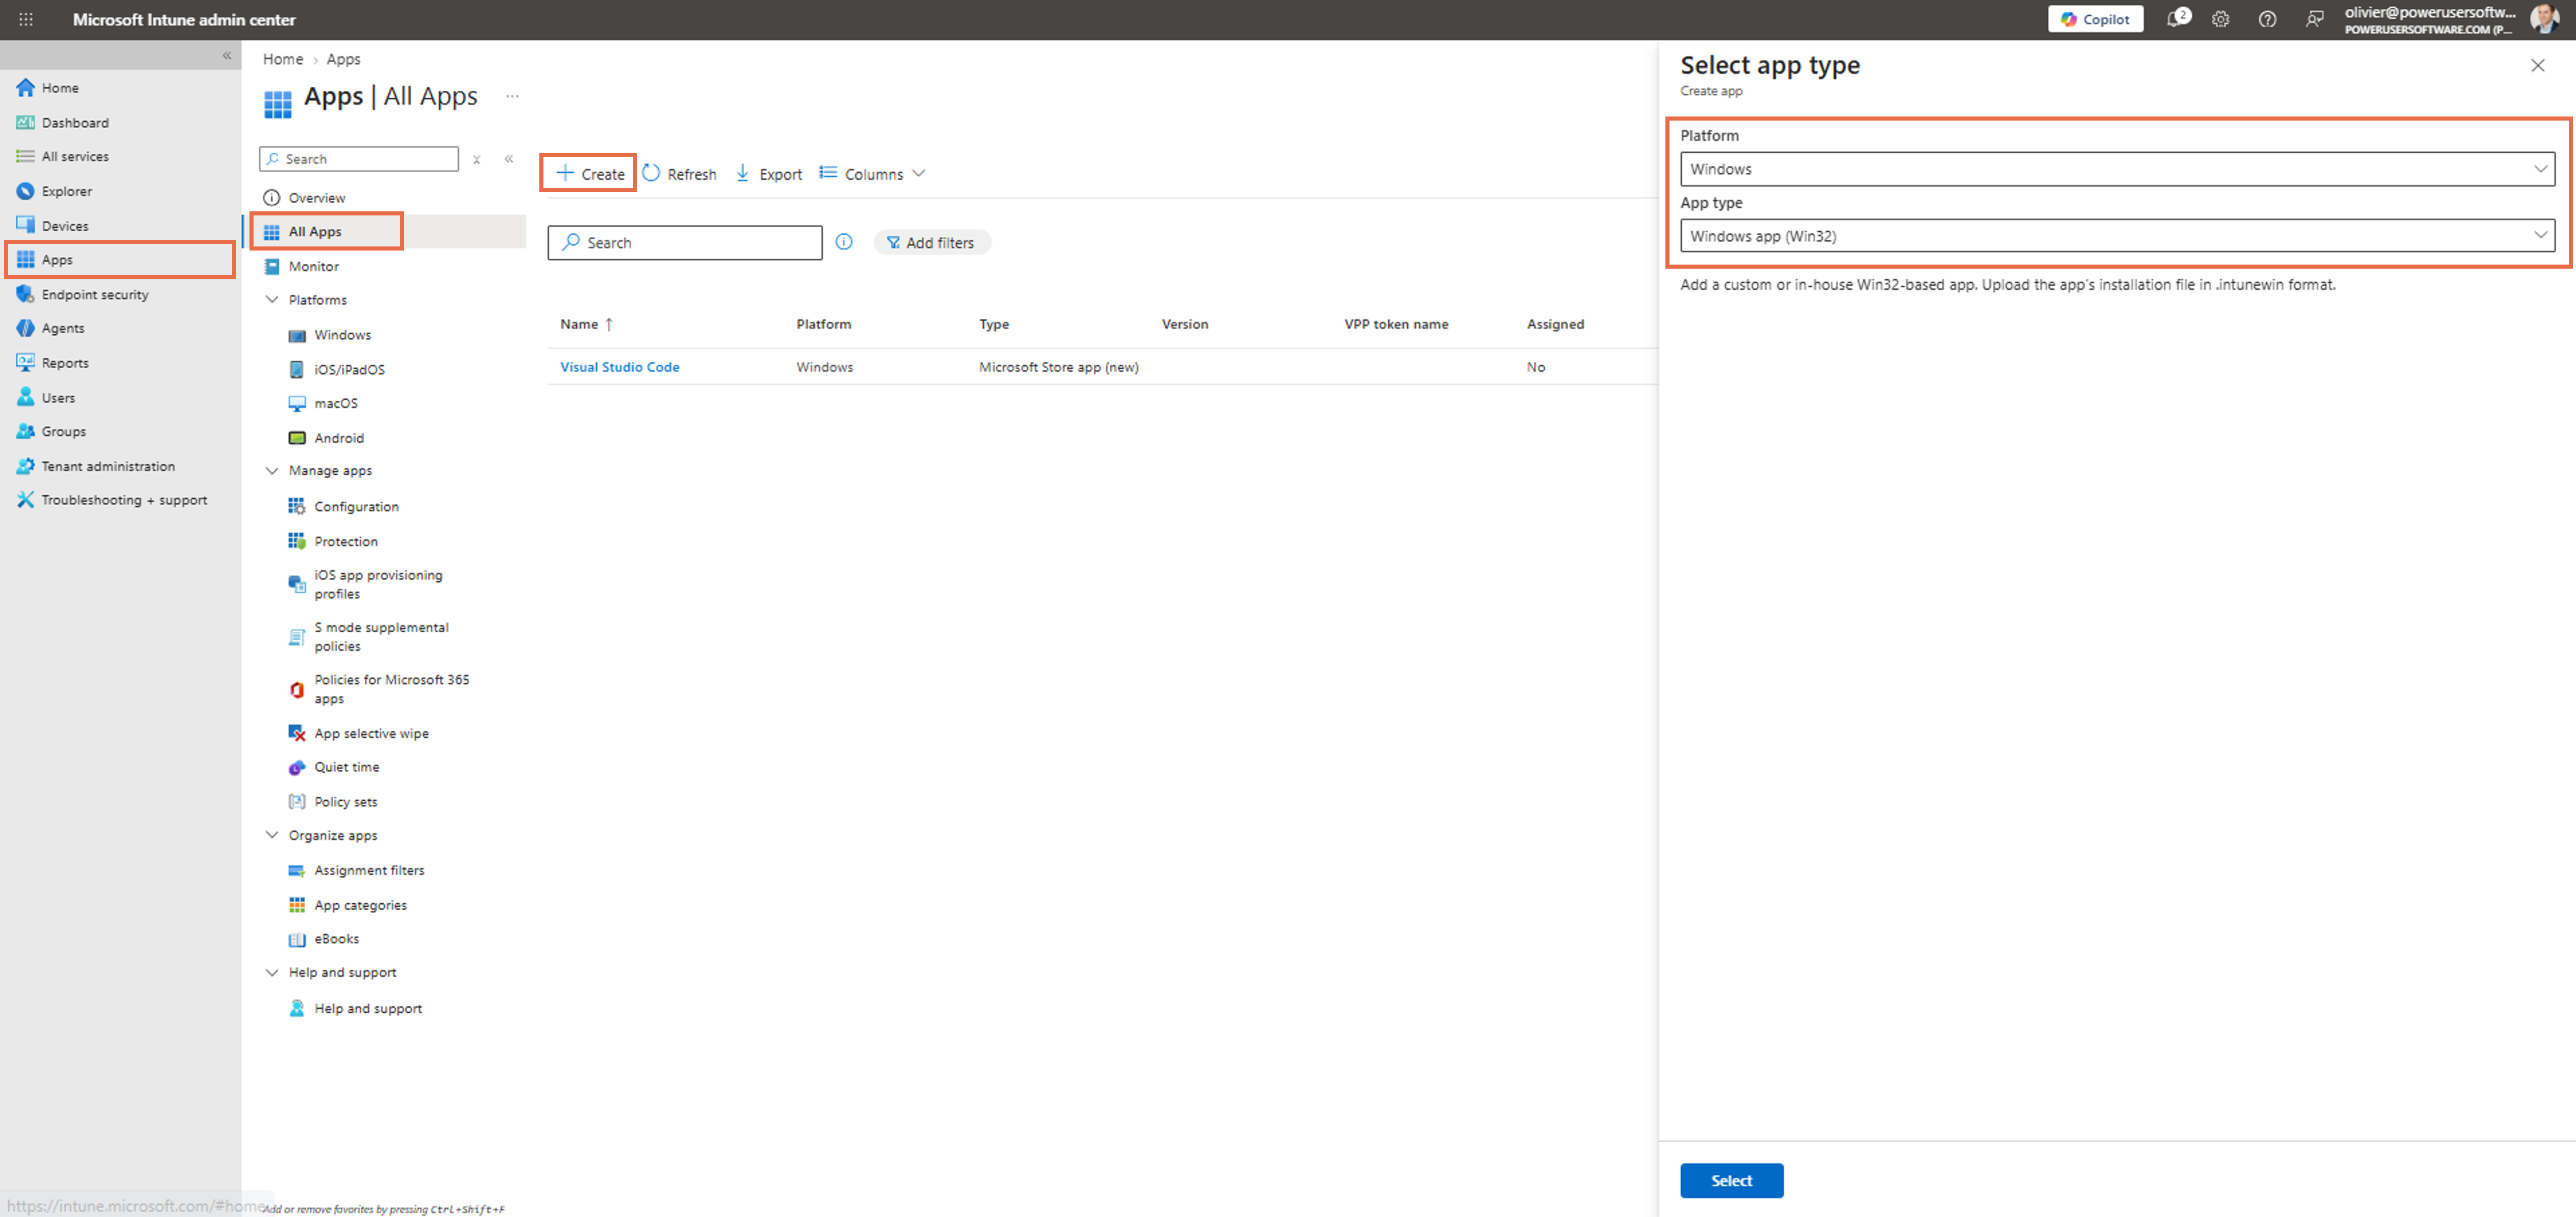
- From the left menu, click "Apps", then "All Apps", and click "Create".
- In the right pane that opens, choose the platform "Windows" and app type "Windows app (Win32)" and click "Select".
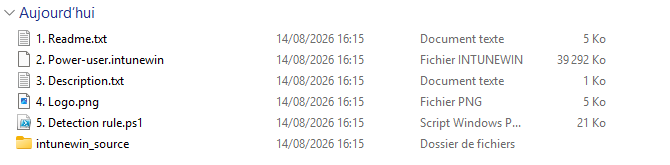
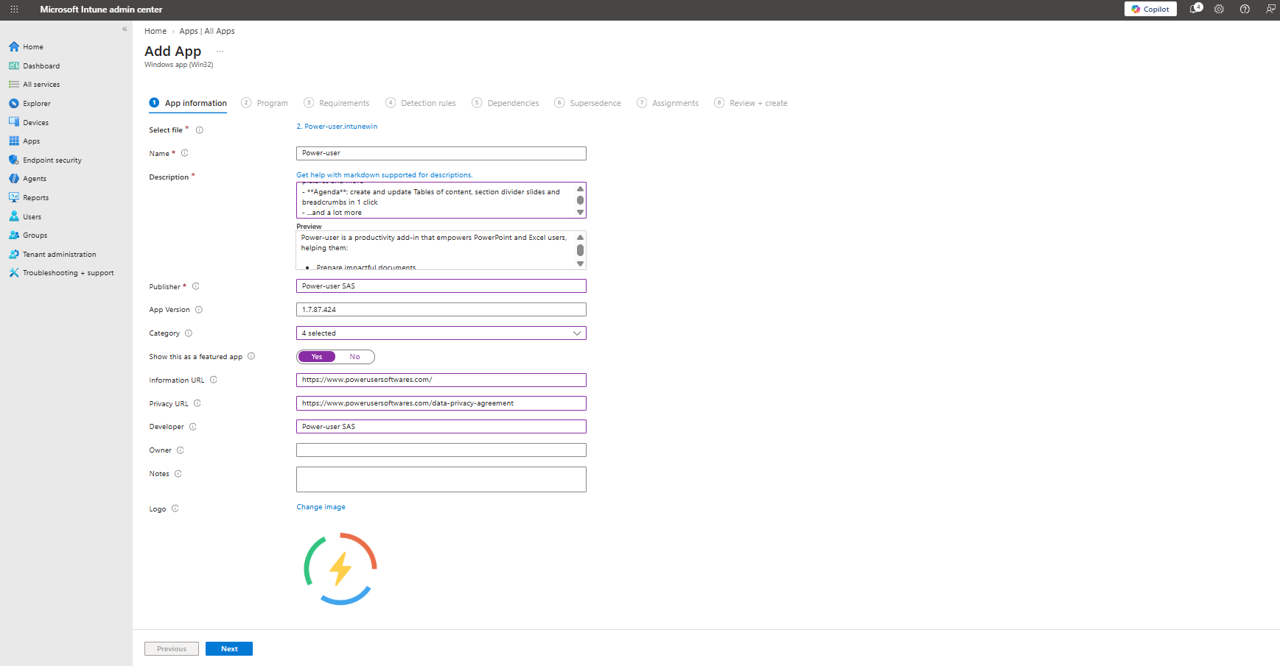
- On the next screen, Intune asks you to select the app package file. Download the Power-user deployment folder from here, unzip it, then select the file "2. Power-user.intunewin" for the upload, and click OK.
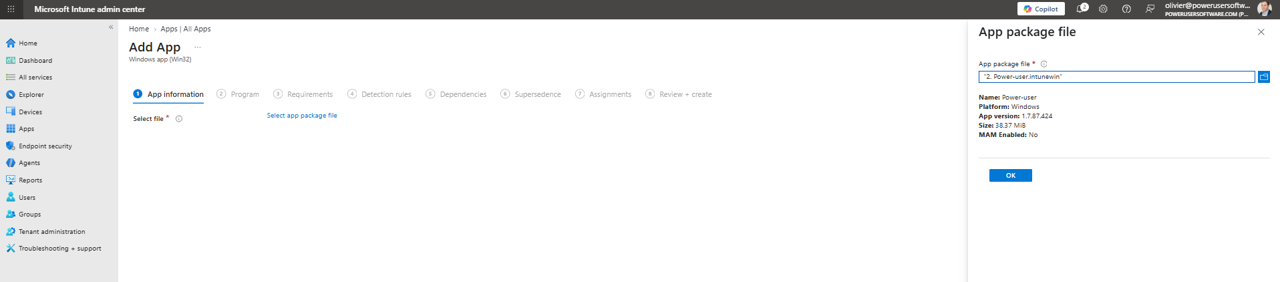 Fill in the app information as per the below instructions:
- Description: Paste here the content of the 3. Description.txt file from the folder downloaded before.
- Publisher: Type Power-user SAS as publisher name.
- Category: Select the following categories: Data management, Productivity, Business and Development & Design.
- Show this as a featured app: You can choose Yes for Power-user to be featured.
- Information url: Paste the url to Power-user's homepage: https://www.powerusersoftwares.com
- Privacy url: Paste the url to the Privacy Policy: https://www.powerusersoftwares.com/data-privacy-agreement
- Developer: Type Power-user SAS as Developer name.
- Owner: You can optionally enter here the name for the point of contact about Power-user in your organization.
- Logo: Upload here the image 4. Logo.png from the Power-user deployment folder.
- Click Next.
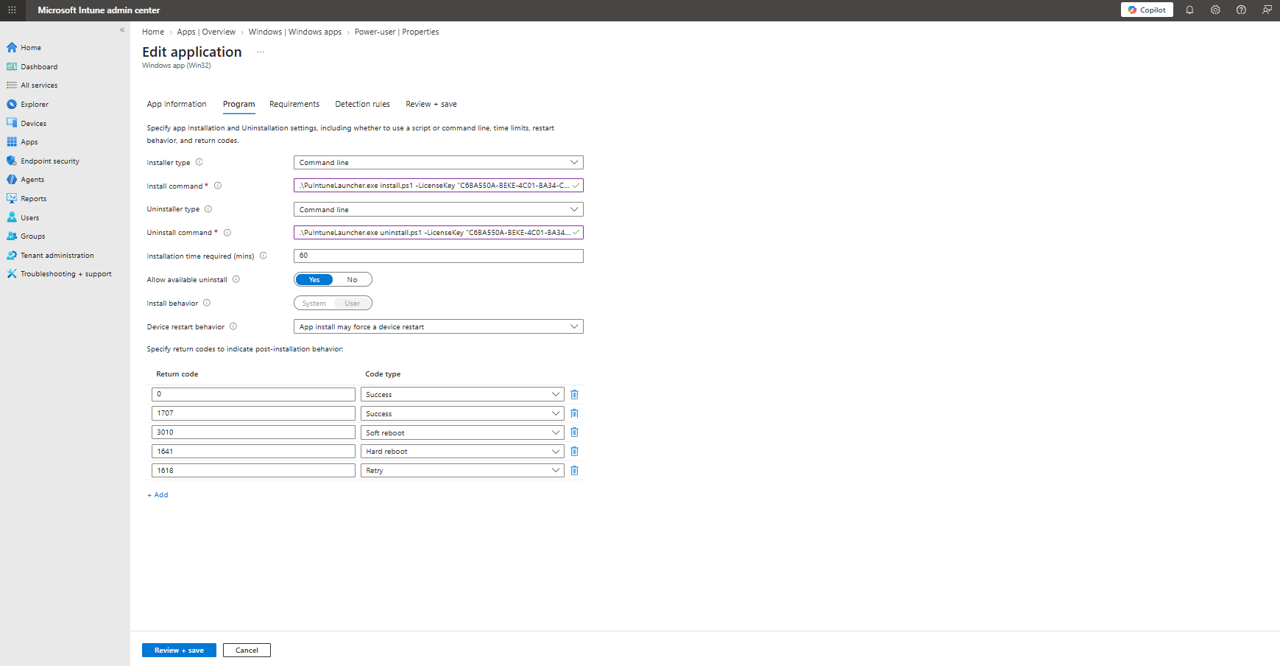
- In the next screen (Program tab),
- In "Install command", type this command line after replacing YOUR-LICENSE-KEY with your actual Power-user license key:
.\PuIntuneLauncher.exe install.ps1 -LicenseKey "YOUR-LICENSE-KEY"
- In "Uninstaller type", select "Command line"
- Then type the following command line in "Uninstall command":
.\PuIntuneLauncher.exe uninstall.ps1 -LicenseKey "YOUR-LICENSE-KEY"
- It should look like below.
- In "Install command", type this command line after replacing YOUR-LICENSE-KEY with your actual Power-user license key:
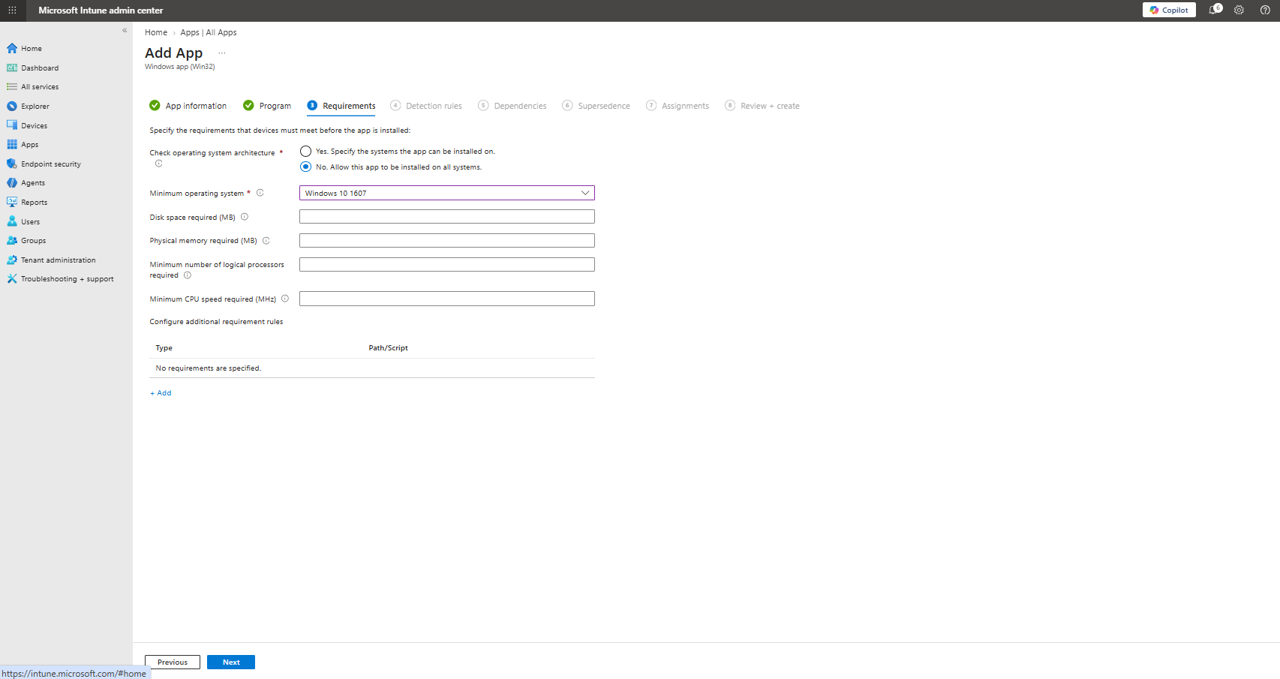
- In the next screen shown below (Requirements tab):
- Minimum operating system: select the first / oldest one (Windows 10 1607) as Power-user is anyway compatible with even much older versions of Windows.
- Click Next.
- Minimum operating system: select the first / oldest one (Windows 10 1607) as Power-user is anyway compatible with even much older versions of Windows.
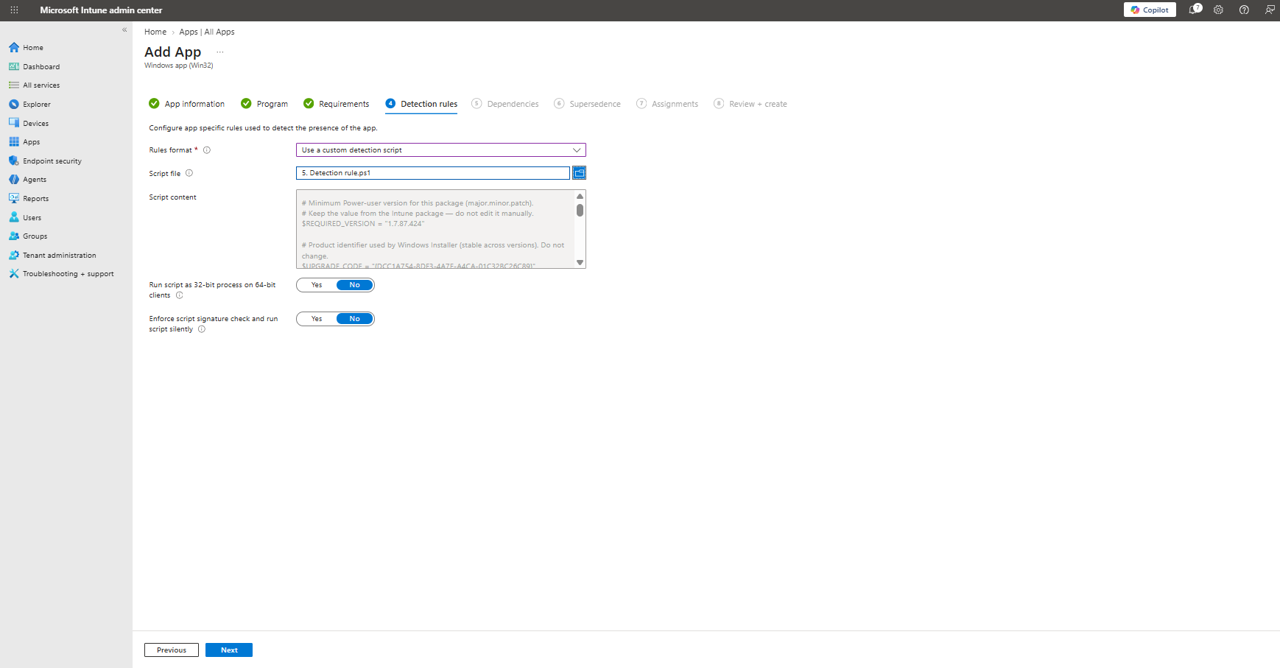
- In the next screen show below (Detection rules):
- Rules format: select Use a custom detection script.
- Script file: Select the file 5. Detection rule.ps1 from the deployment folder.
- In the next screen (Dependencies tab), you don't need to change anything. Just click Next again.
- In the next screen (Supersedence tab), you don't need to change anything. Just click Next again.
- In the next screen (Assignments tab), under Required, choose either Add all users or Add group.
- If you don't want to install Power-user on the users computers, but only want to make it visible in the Company portal app, do the same but under Available for enrolled devices instead of Required.
- If you want to delay the installation to happen at a specific date & time, instead of immediately, click under Delivery optimization priority and set up your preferences.

- Click Next.
- In the final screen (Review + create tab), review your submission and click Create.
If you want to update the version of Power-user in your package, you should download the new .zip folder from the link provided above. You will have to replace both the 2. Power-user.intunewin file and the 5. Detection rule.ps1 file.
Was this article helpful?
That’s Great!
Thank you for your feedback
Sorry! We couldn't be helpful
Thank you for your feedback
Feedback sent
We appreciate your effort and will try to fix the article