Table Styles is a feature of the Power-user add-in for Excel that applies your corporate table formats to a row of cells in one click, from the Row styles gallery. Font, size, color, bold, fill, borders and alignment are applied at once, so every table looks the same without formatting cell by cell.
In short
- Where: the Row styles gallery in the Power-user tab of Excel
- What you get: consistent tables in your brand, with text and numbers formatted differently
- Your own styles: edit the Styles.xlsx file, or keep one file per brand
- Shortcuts: assign a keyboard shortcut to each style in the Command Center
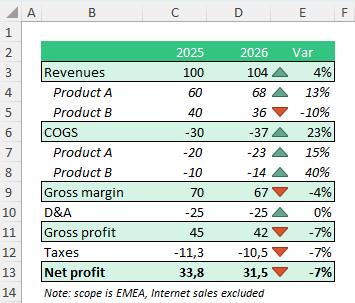
Excel table formatted row by row with Power-user Table Styles
In this article
How to apply a row style in Excel
- Select a row of cells in your table.
- On the Power-user tab, click Row styles to open the gallery.
- Click the style to apply. The row is formatted.

Row styles gallery in the Power-user tab of Excel
When it applies a style, Power-user:
- formats each cell of the selection;
- formats text and numbers differently, for example text aligned left and numbers aligned right, if the style defines it;
- applies the borders to the whole row, not to each cell, so no unwanted inner borders appear.
Customize the row styles
Edit or add your own styles
- In the Power-user tab, click Row styles, then Select new row styles at the bottom of the gallery. The folder that contains Styles.xlsx opens: this file holds the row styles.
- Open Styles.xlsx. The Row styles sheet shows the default styles.
- Edit a style by formatting its cells directly: colors, fonts, sizes, borders, bold, italic, underline. To add a style, insert it below or between the existing ones, with two columns like them: one for text and one for numbers.
- Save and close the file. The Row styles gallery is updated the next time you open Excel.
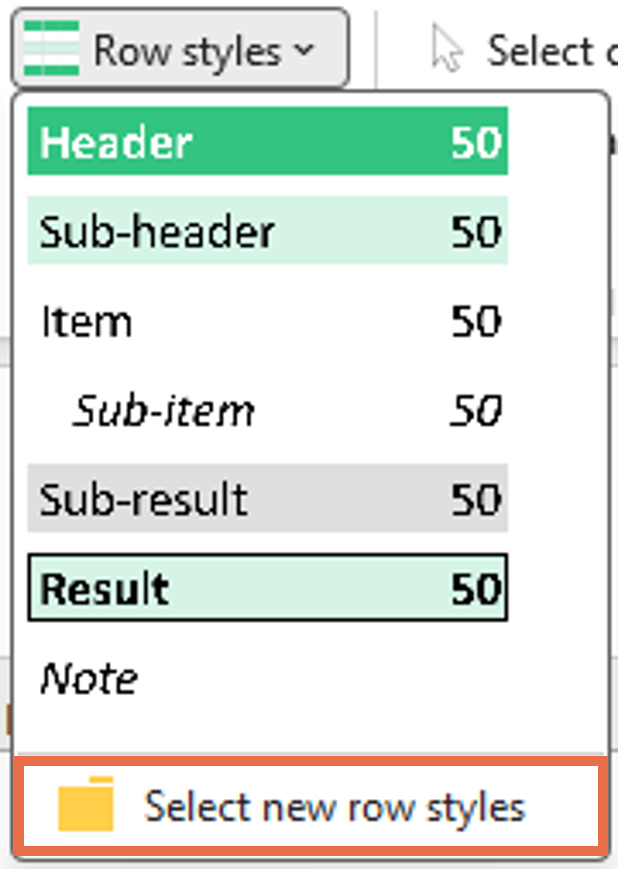
Select new row styles at the bottom of the Row styles gallery
Note: if a style has borders and the style above or below has none, leave a blank row between them. This way the borders of one style do not affect its neighbors.
Create several sets of styles
If you work for several brands, keep one set of styles per brand instead of mixing them in the same file:
- Make a copy of Styles.xlsx and edit it with the new styles.
- In the Row styles gallery, click Select new row styles and choose the new file. The gallery now shows its styles.
To go back, select the previous file again.
For admins: styles for the whole organization
To set up the same row styles for a whole group of users, contact us.
Frequently asked questions about table styles in Excel
How do I apply my company table style in Excel?
With the Power-user add-in, select a row of cells, click Row styles in the Power-user tab and click a style. Font, colors, fill, borders and alignment are applied at once.
How do I create my own table styles with Power-user?
Click Row styles, then Select new row styles to open the folder of Styles.xlsx. Edit or add styles in its Row styles sheet, with one column for text and one for numbers, then save. The gallery is updated the next time you open Excel.
Can I have different table styles for different brands?
Yes. Make a copy of Styles.xlsx for each brand and switch between them with Select new row styles in the Power-user Row styles gallery.
Can I add a keyboard shortcut to a table style in Excel?
Yes. In the Power-user Command Center, give each row style its own shortcut, or create one shortcut that cycles through the styles.
Why does Power-user apply borders to the whole row?
Power-user Table Styles apply borders to the whole selected row rather than to each cell, so that no unwanted inner borders appear between the cells.
Was this article helpful?
That’s Great!
Thank you for your feedback
Sorry! We couldn't be helpful
Thank you for your feedback
Feedback sent
We appreciate your effort and will try to fix the article