The Agenda builder (CTRL+SHIFT+A) is one of the most powerful features in Power-user. This tool helps you work your storytelling and automatically structure your presentation with table of content pages that can be easily updated.
TABLE OF CONTENTS
Benefits of using the Agenda
The importance of having an agenda to structure a presentation
Any good business presentation needs to be properly structured with an Agenda. Because a presentation is a demonstration, people need to follow the logic to be convinced. A presentation's structure can be built using the Minto Pyramid Principle, a very famous methodology developped for McKinsey strategy consultants.
A table of content usually lists all indexed sections in the presentation with the corresponding page number. Very often, these pages are repeated at the beginning of each section in the presentation, with a highlight on the next section. This helps people understand which section have been seen already, what comes next, and how it is part of the bigger demonstration.
Creating agenda pages manually is a highly time-consuming process
In Microsoft Word, users can generate table of contents automatically. But unfortunately, Microsoft PowerPoint doesn't come with an equivalent feature.
So in PowerPoint, users have to create agenda pages manually, listing section numbers, section names, page numbers, etc. If the agenda is duplicated for each section, it becomes very long to update them. For every new section or slide added or deleted, all the objects need to be adjusted and aligned again, on each agenda page. So if you have 10 sections already, it means you will have to replicate all your changes 10x, something that can a huge amount of time.
About the Power-user Agenda
With Power-user, you can create, design and update agenda pages automatically in your entire presentation:
- Simply list your sections once (or load sections already existing in your presentatino),
- Easily edit section names and slide titles to build a compelling storyline for your audience,
- Select your preferred visual style, switch between using a table of content or a divider format, and easily customize the agenda pages with your colors, numbering style, etc,
- Whenever there are changes to your structure, update all the agenda pages at once with just 1 click!
This feature can save you 20 min every time you have to update the agenda for your presentation, while ensuring it's always up to date and error-free.
How to create an Agenda with Power-user
Opening the Agenda
From the Power-user tab, click the Agenda button located at the center of the ribbon, under the Format menu.

Once you have clicked Agenda, Power-user will open the below task pane at the right of your screen, like shown below: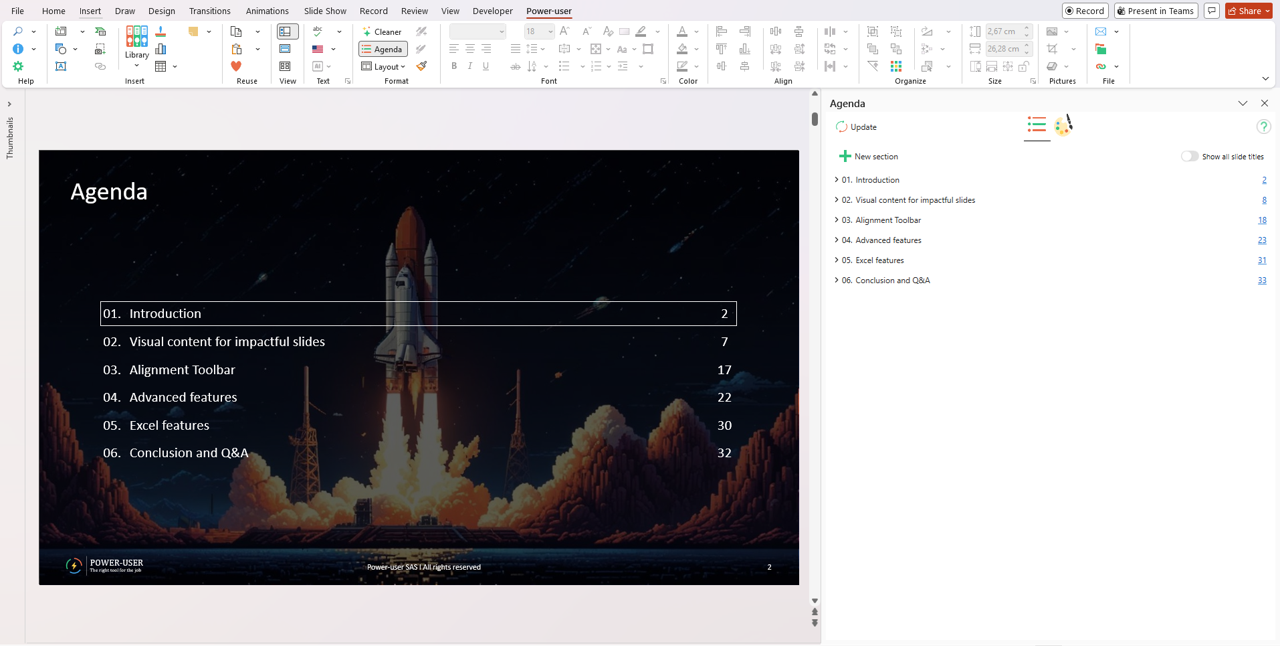
Creating the Agenda structure
From the Agenda task pane shown above, you can create the presentation for your agenda. The pane lists all your sections and slide titles, and lets you structure them:
- Click "New section" for each section to add. The section will be added after the slide currently selected.
- Click a section name in the list to rename it.
- Increase the indent level to turn a section into a sub-section.
- Move your slides and sections up or down with the up/down arrows.
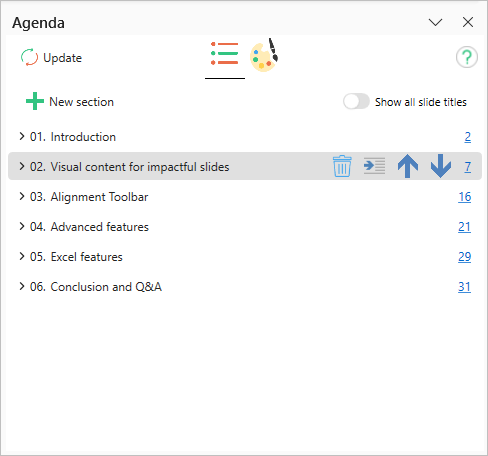
If you toggle the "Show all slide titles" button ON, you will see the list of slide titles under each section. We recommend using this for working on your storytelling. You can make sure that your section names are consistent with your slide titles, and that the all presentation will unfold in a natural and compelling way to convince your audience.
Once you are happy with your presentation structure, click Update at the bottom of the pane. Power-user will synchronize the Agenda structure from Power-user with all Agenda slides and objects in the presentation.
Customizing the Agenda design
We recommend that admins set up the Agenda once directly in their master template, then distribute the template to all users and set it as the new default, using the Themes functionality from their Admin portal. This way the set up will be done once for all users.
Choose the main items of your Agenda
Once you have set up a default Agenda, you will want to customize it to match your brand and style.
For this, in the "Agenda" pane, click the "Design" tab.
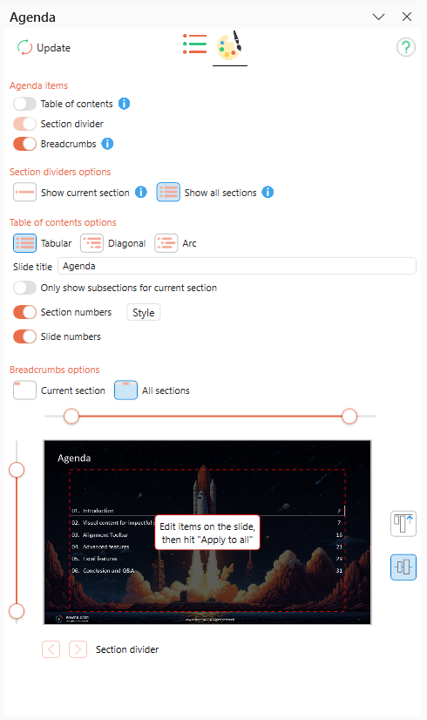
From this menu, you can set up a number of key options for your Agenda, explained below.
Table of contents: if this option is ON, there will be a first table of contents slide at the beginning of the presentation. It will come before the first section. Turn if OFF if you want to start directly with the first section.
Section dividers: at the beginning of each section, there is one of these slides introducing the section. There are 2 options for section dividers:
- Show current section, so that only the name of the section coming up is displayed.
- Show all sections, which in a way is similar to the Table of contents, but with a visual highlight on the current section.
Breadcrumbs: sometimes also designated as eyebrows, these are reminders of the presentation's agenda, visible on each slide in the presentation. They act like a kind of menu bar, so the audience always now where we are and how the current slide fits with the rest of presentation. Breadcrumbs can be turned ON or OFF, with 2 options:
- Current section, if only a reminder of the current section should be show on each slide
- All sections, if the breadcrumbs should show the entire menu of the presentation on each slide.
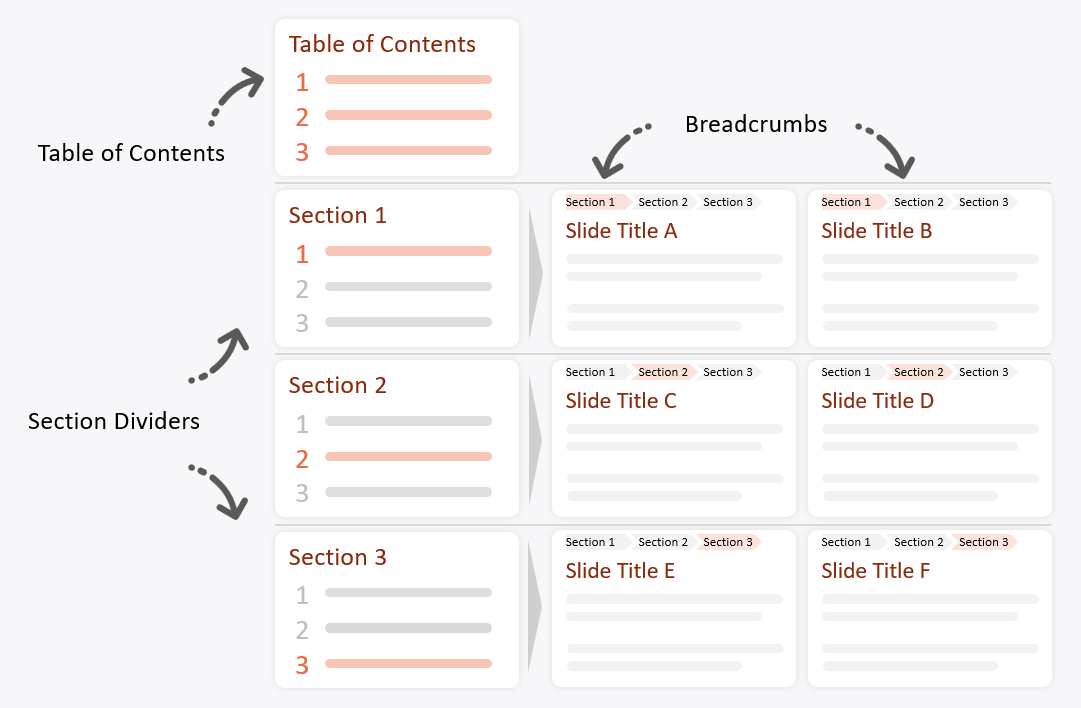
Below is a visual illustration of how Table of Contents, Section Dividers and Breadcrumbs differ.
In this Design menu, you can set up key options impacting your presentation's agenda, including:
- Add a Table of Contents slide or not
- Use Section Dividers with only the current section or all section
- Use a Tabular, Diagnonal or Circular design for the slides showing all sections
- Show or hide section numbers, and customize the style of the section numbers for each section, for instance 1) 2) 3), or I, II, III, or A, B, C.
- Show or hide slide numbers
- Customize the title of the Table of contents page.
- Define if subsections should be listed on all agenda pages, or just on the pages of the corresponding section.
- Change the position of the agenda on the slide. You can customize the top/left/right/bottom margins to place the agenda exactly where you need it to be.
- Set up if the Table of contents should be aligned from the top of the slide or from the center.
Once your options are set, click "Update" on top. Power-user will create slides and objects reflecting your choices.
Customizing the layout for Agenda pages
In PowerPoint, all slides are based on layout from the Slide Master. So when an Agenda page is created, Power-user will initially apply a layout by default.
One of the first things you should do is make sure the proper layout is used. Using the right layout will allow you to have the right size and position for your titles, logos and other items that are part of the slide background.
To choose a layout, go to the View tab of PowerPoint, then Slide Master View. Then right-click a layout, and choose Set as Agenda layout for, then decide if the layout should apply to agenda slides showig all sections or those showing only the current section.
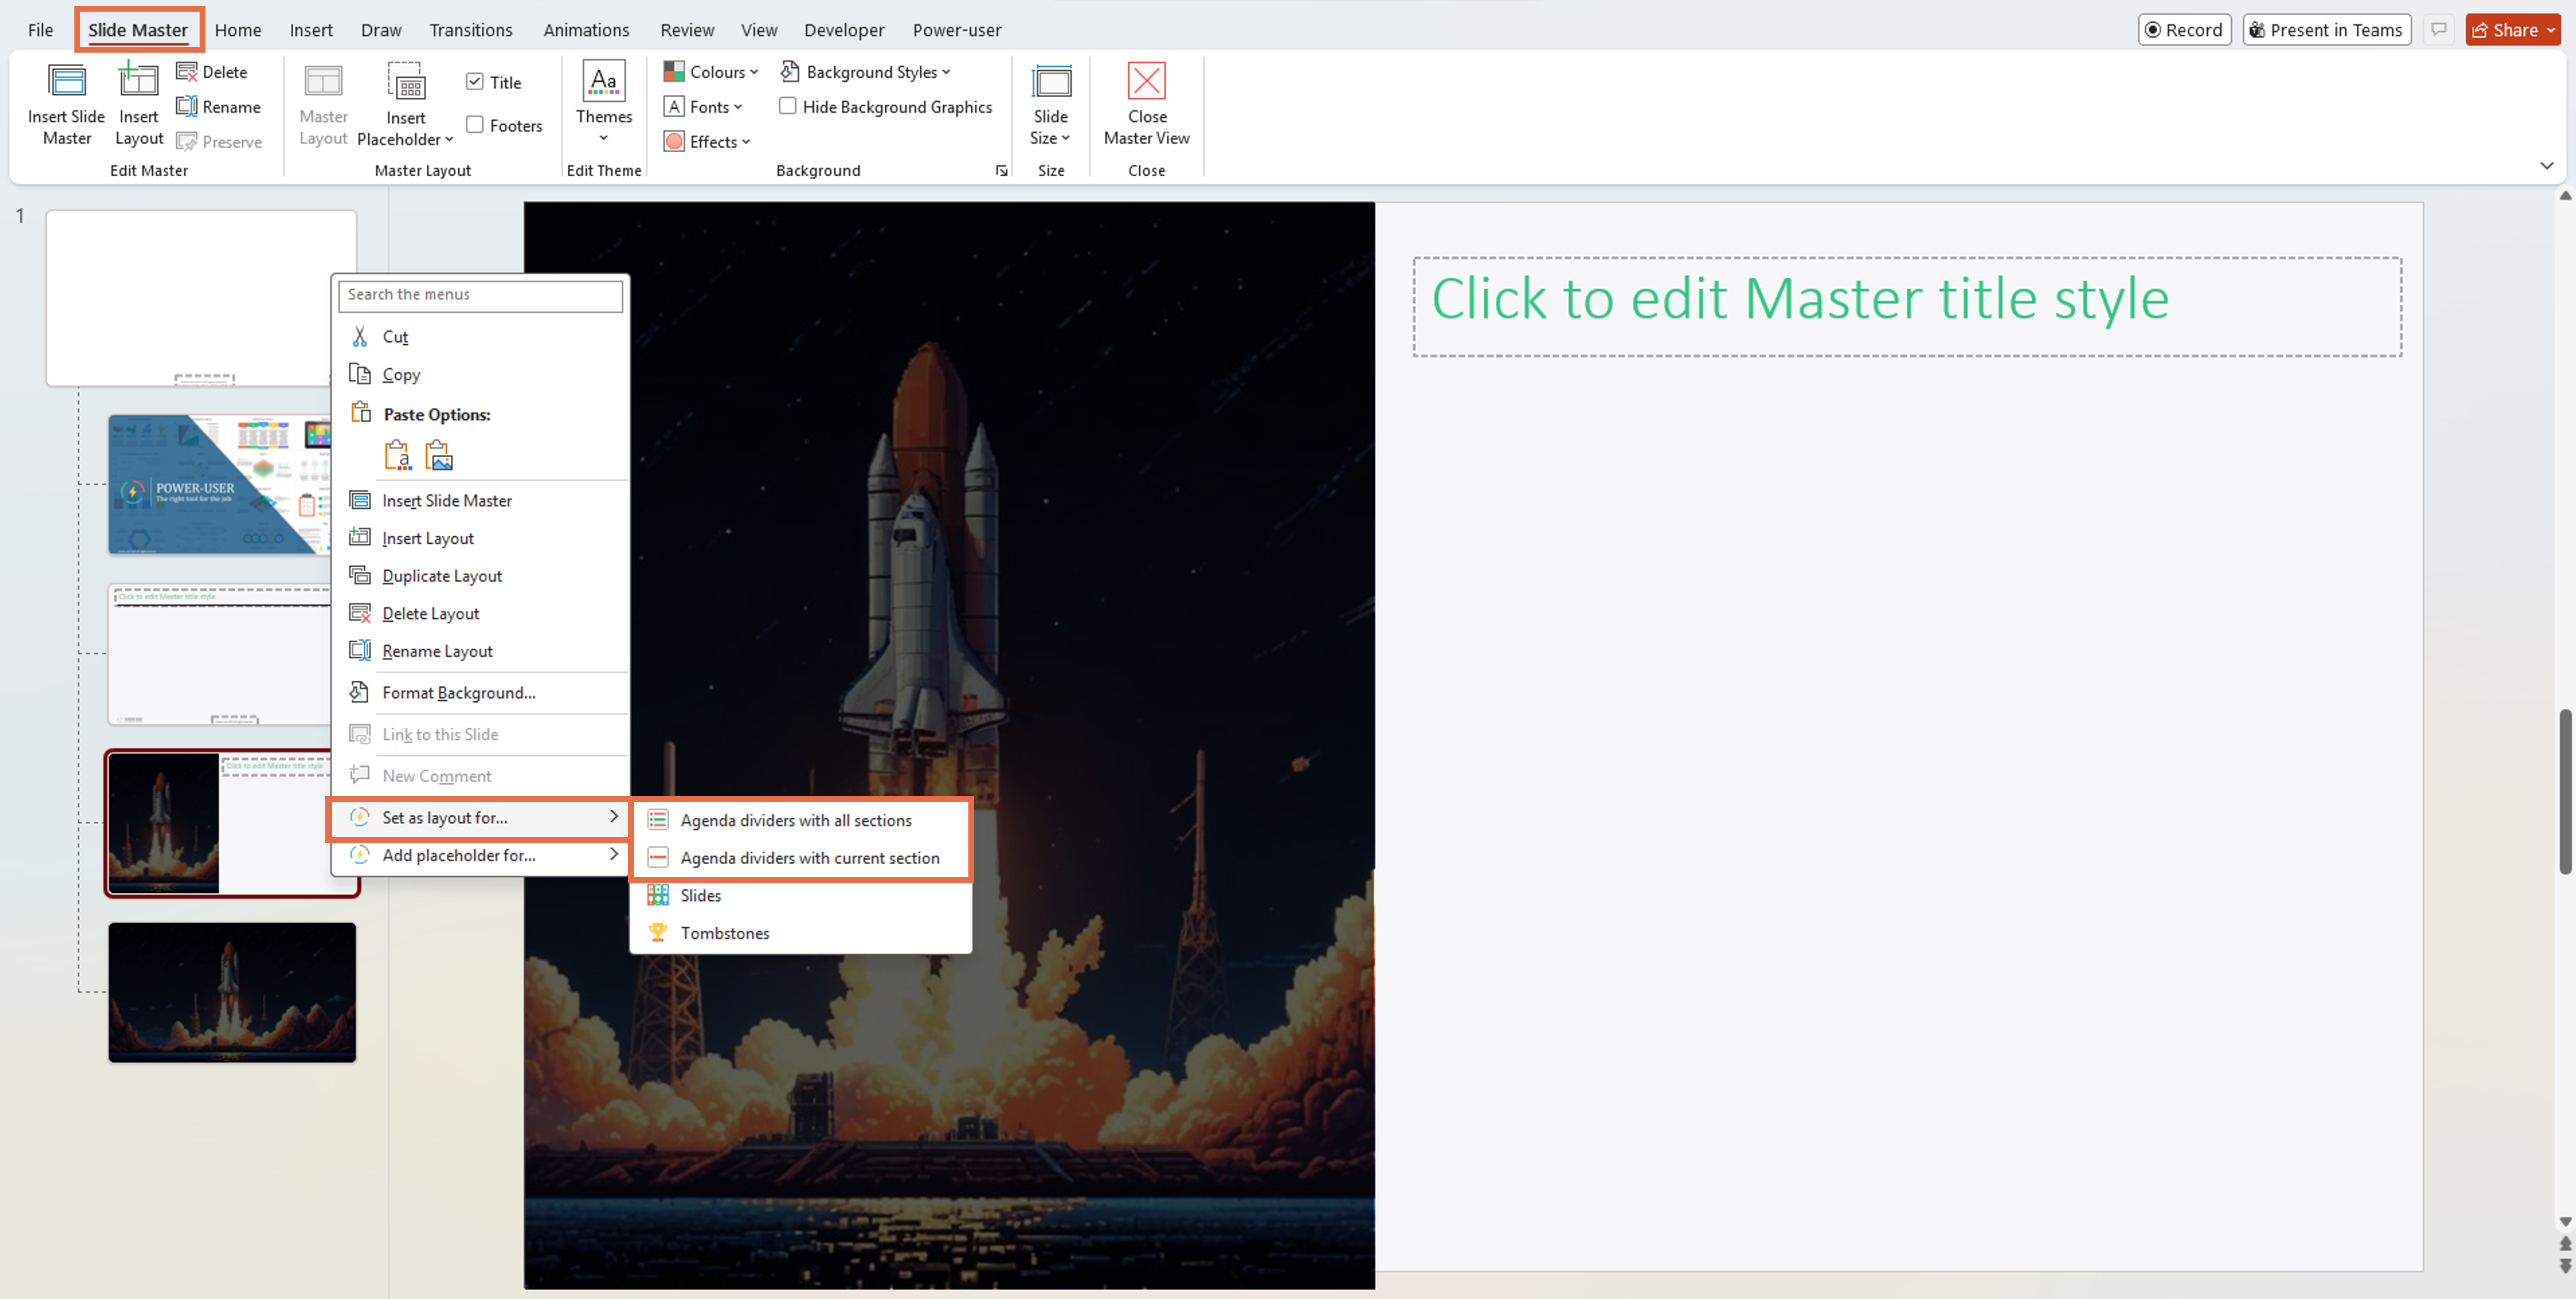
This will tell Power-user to always use this layout whenever you create or update agenda pages. Make sure you "Update" the Agenda again to reflect the change.
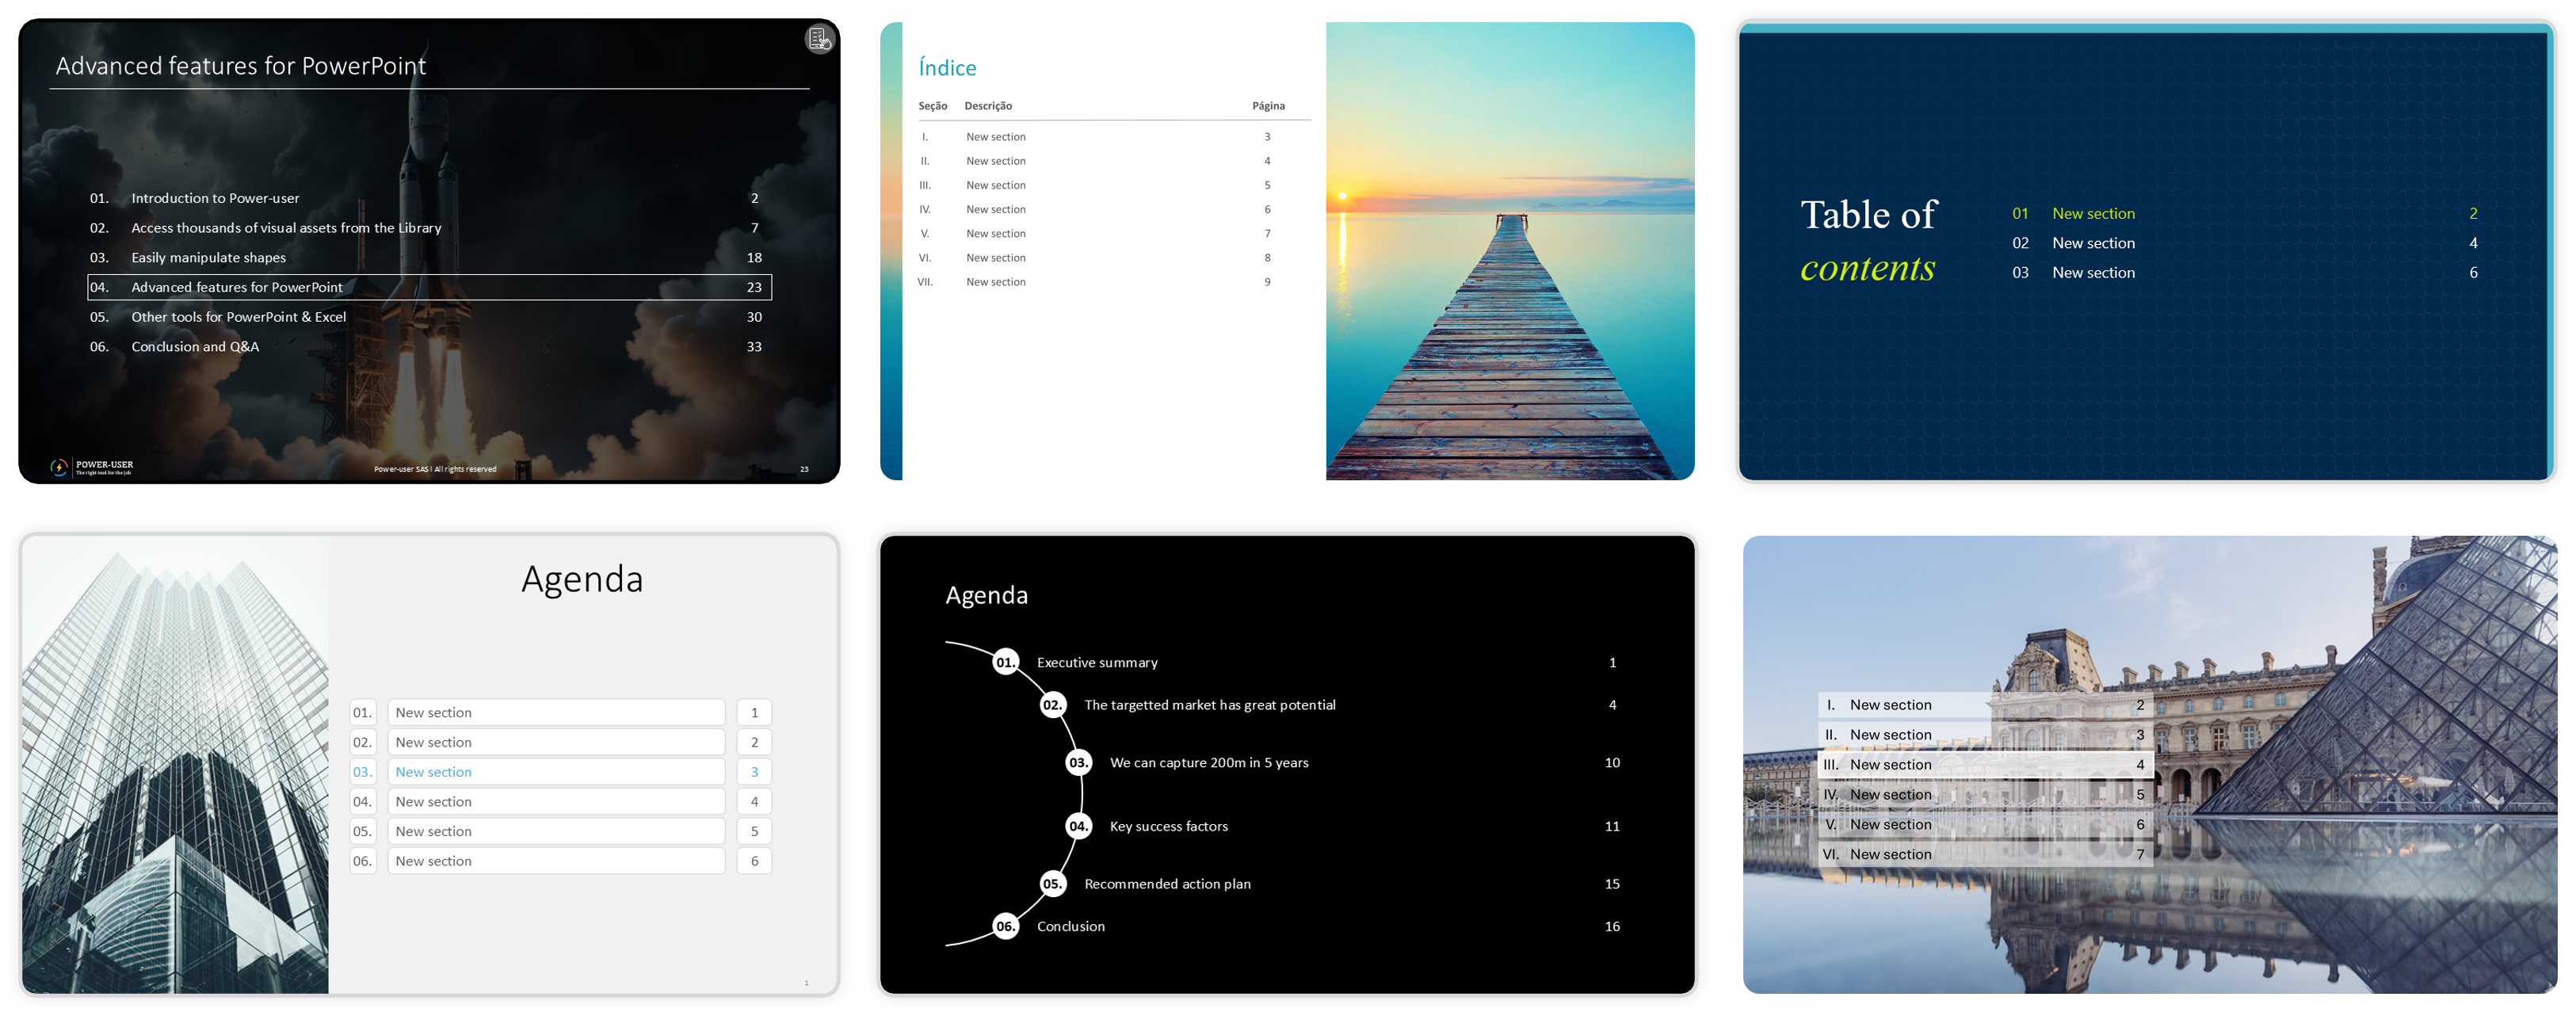
Customizing the slides for Table of Contents and Section Dividers with Show all sections
A Table of Contents contains multiple objects:
- Section numbers
- Section names
- Page numbers
Section Dividers will sections are similar to a Table of Contents slide, but they also contain a separate section number, section name, page number and background rectangle shape, so that you can define a specific look for the highlighted section.
Each of these objects can be edited separately, so that you have a lot of flexibility to design the slide just the way you want it to be.
To edit an object of the agenda page, just click it and edit just like you would for any regular shape, using the usual PowerPoint interface. You can change colors, font sizes, text margins, add bold/italic/underline, change the shape type and a lot more, so that this object looks exactly the way you want.
Once an item it ready, just click "Apply to all" from the contextual menu on that shape, and this object style will be replicated on all similar objects of all agenda pages.

Below are a few examples of pages, to give you an idea of the many possibilities.
EXPERT TRICKS:

- Changing shape type: you can turn the rectangle shapes into other shape types (for instance to put the section numbers in a circle rather than a square). For this, go to the "Shape Format"  tab of PowerPoint, and then "Edit shape".

- Adding underline / separators: if you wish to have just a line below the highlighted section or below all sections, you can change the shape type of the section name into the shape type called "Call-Out Line With No Border". Then position the line horizontally and save with "Apply to all".

- Adding vertical spacing: if you want the content of the slide to have more vertical spacing, you can add some Top/Bottom margins to the shape, then activate the property called "Resize shape to fit text". Then hit "Apply to all", and update the "Agenda".
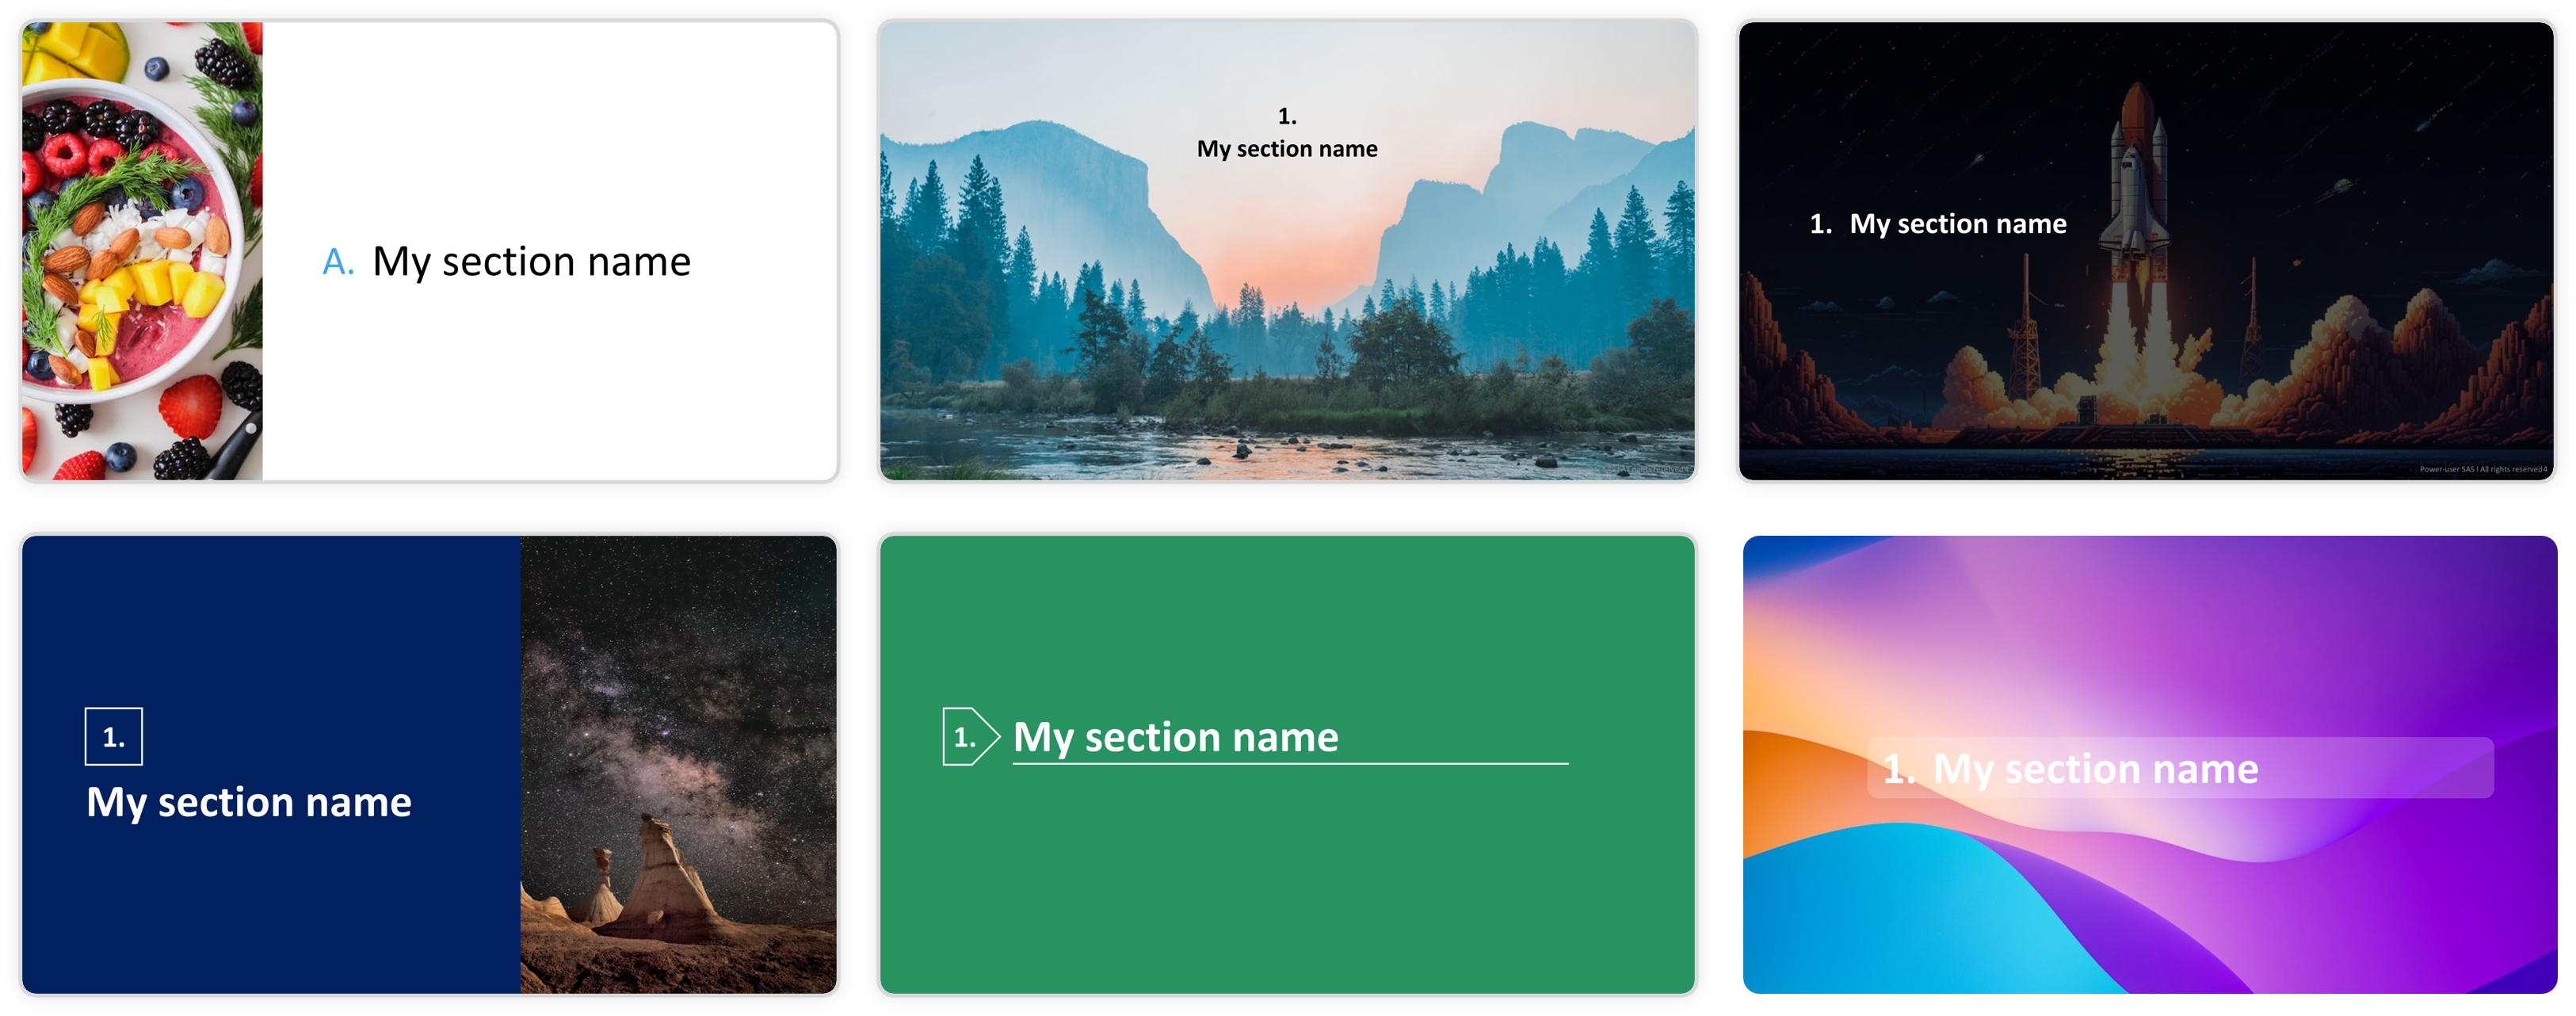
Customizing the slide for Section Dividers with Show current section
If you have opted for Show current section, there will be 2 objets on the slide: the section number and the section name.
Simply position and format them on the slide as you wish, and click "Apply to all". Your preferences will be reflected on all other Section Dividers.
Below are some examples of Section Dividers you could create with the Show current section option.
Customizing the Breadcrumbs
The Power-user Agenda can be linked to Breadcrumbs that will show on each slide the current section, and how it fits in the presentation's agenda, like illustrated below.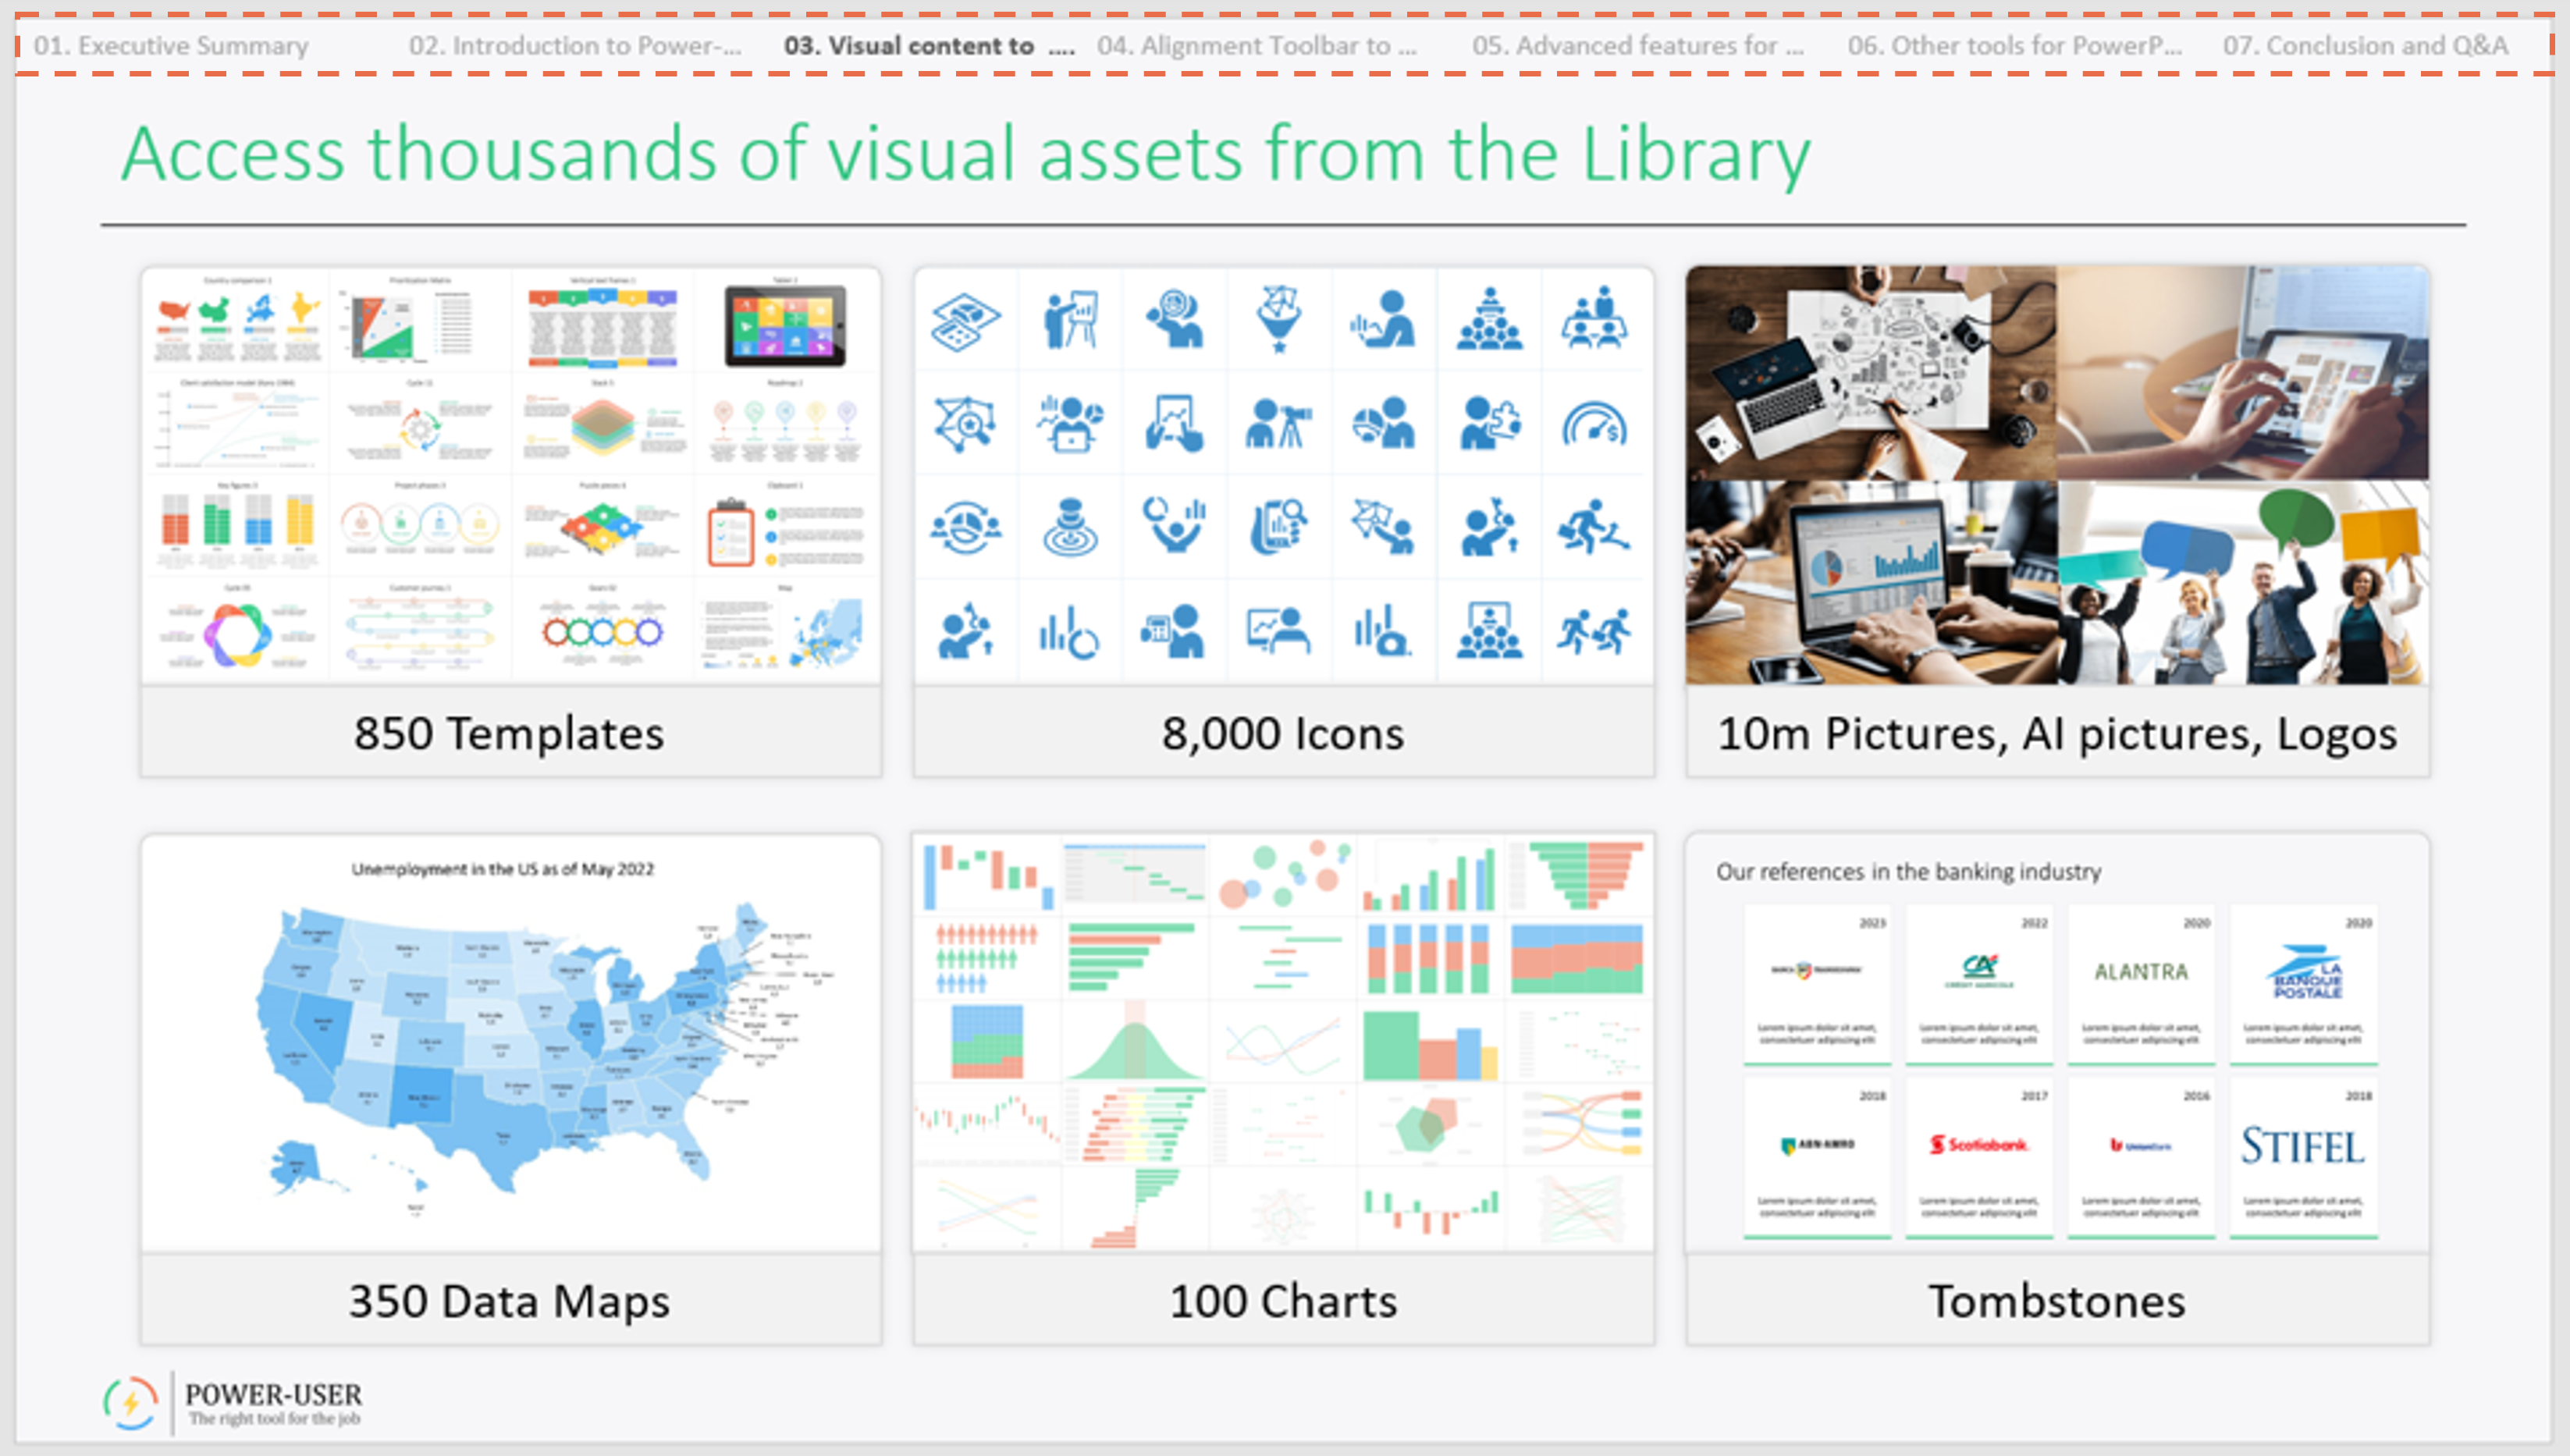
Breadcrumbs can be activated from the Agenda's Design tab. They can include:
- Only the current section name,
- Or all section names in the presentation, with a distinctive format highlighting the current section.
To define the position and format of Breadcrumbs, you can move and edit directly the Breadcrumbs on the slide, then click "Apply to all" to replicate the format and respective position to all other sections.
Hiding Breacrumbs on specfic slides
If there are some specific slides where you want the Breadcrumb, simply select it, go to the "Shape Format" tab of PowerPoint, and open the "Selection Pane". The Selection Pane will show all the shapes on the current slide, and highlight your current selection. Click the eye button next to that shape to hide it.
Setting up different Breacrumbs position or design per layout
Breadcrumbs can be set up at the layout level, in order to have a position, color, visibility etc. that depends on the layout of each slide.
For example, you will need this if you want the Breadcrumbs to be white on slides with a dark background but white on slides with a white background.
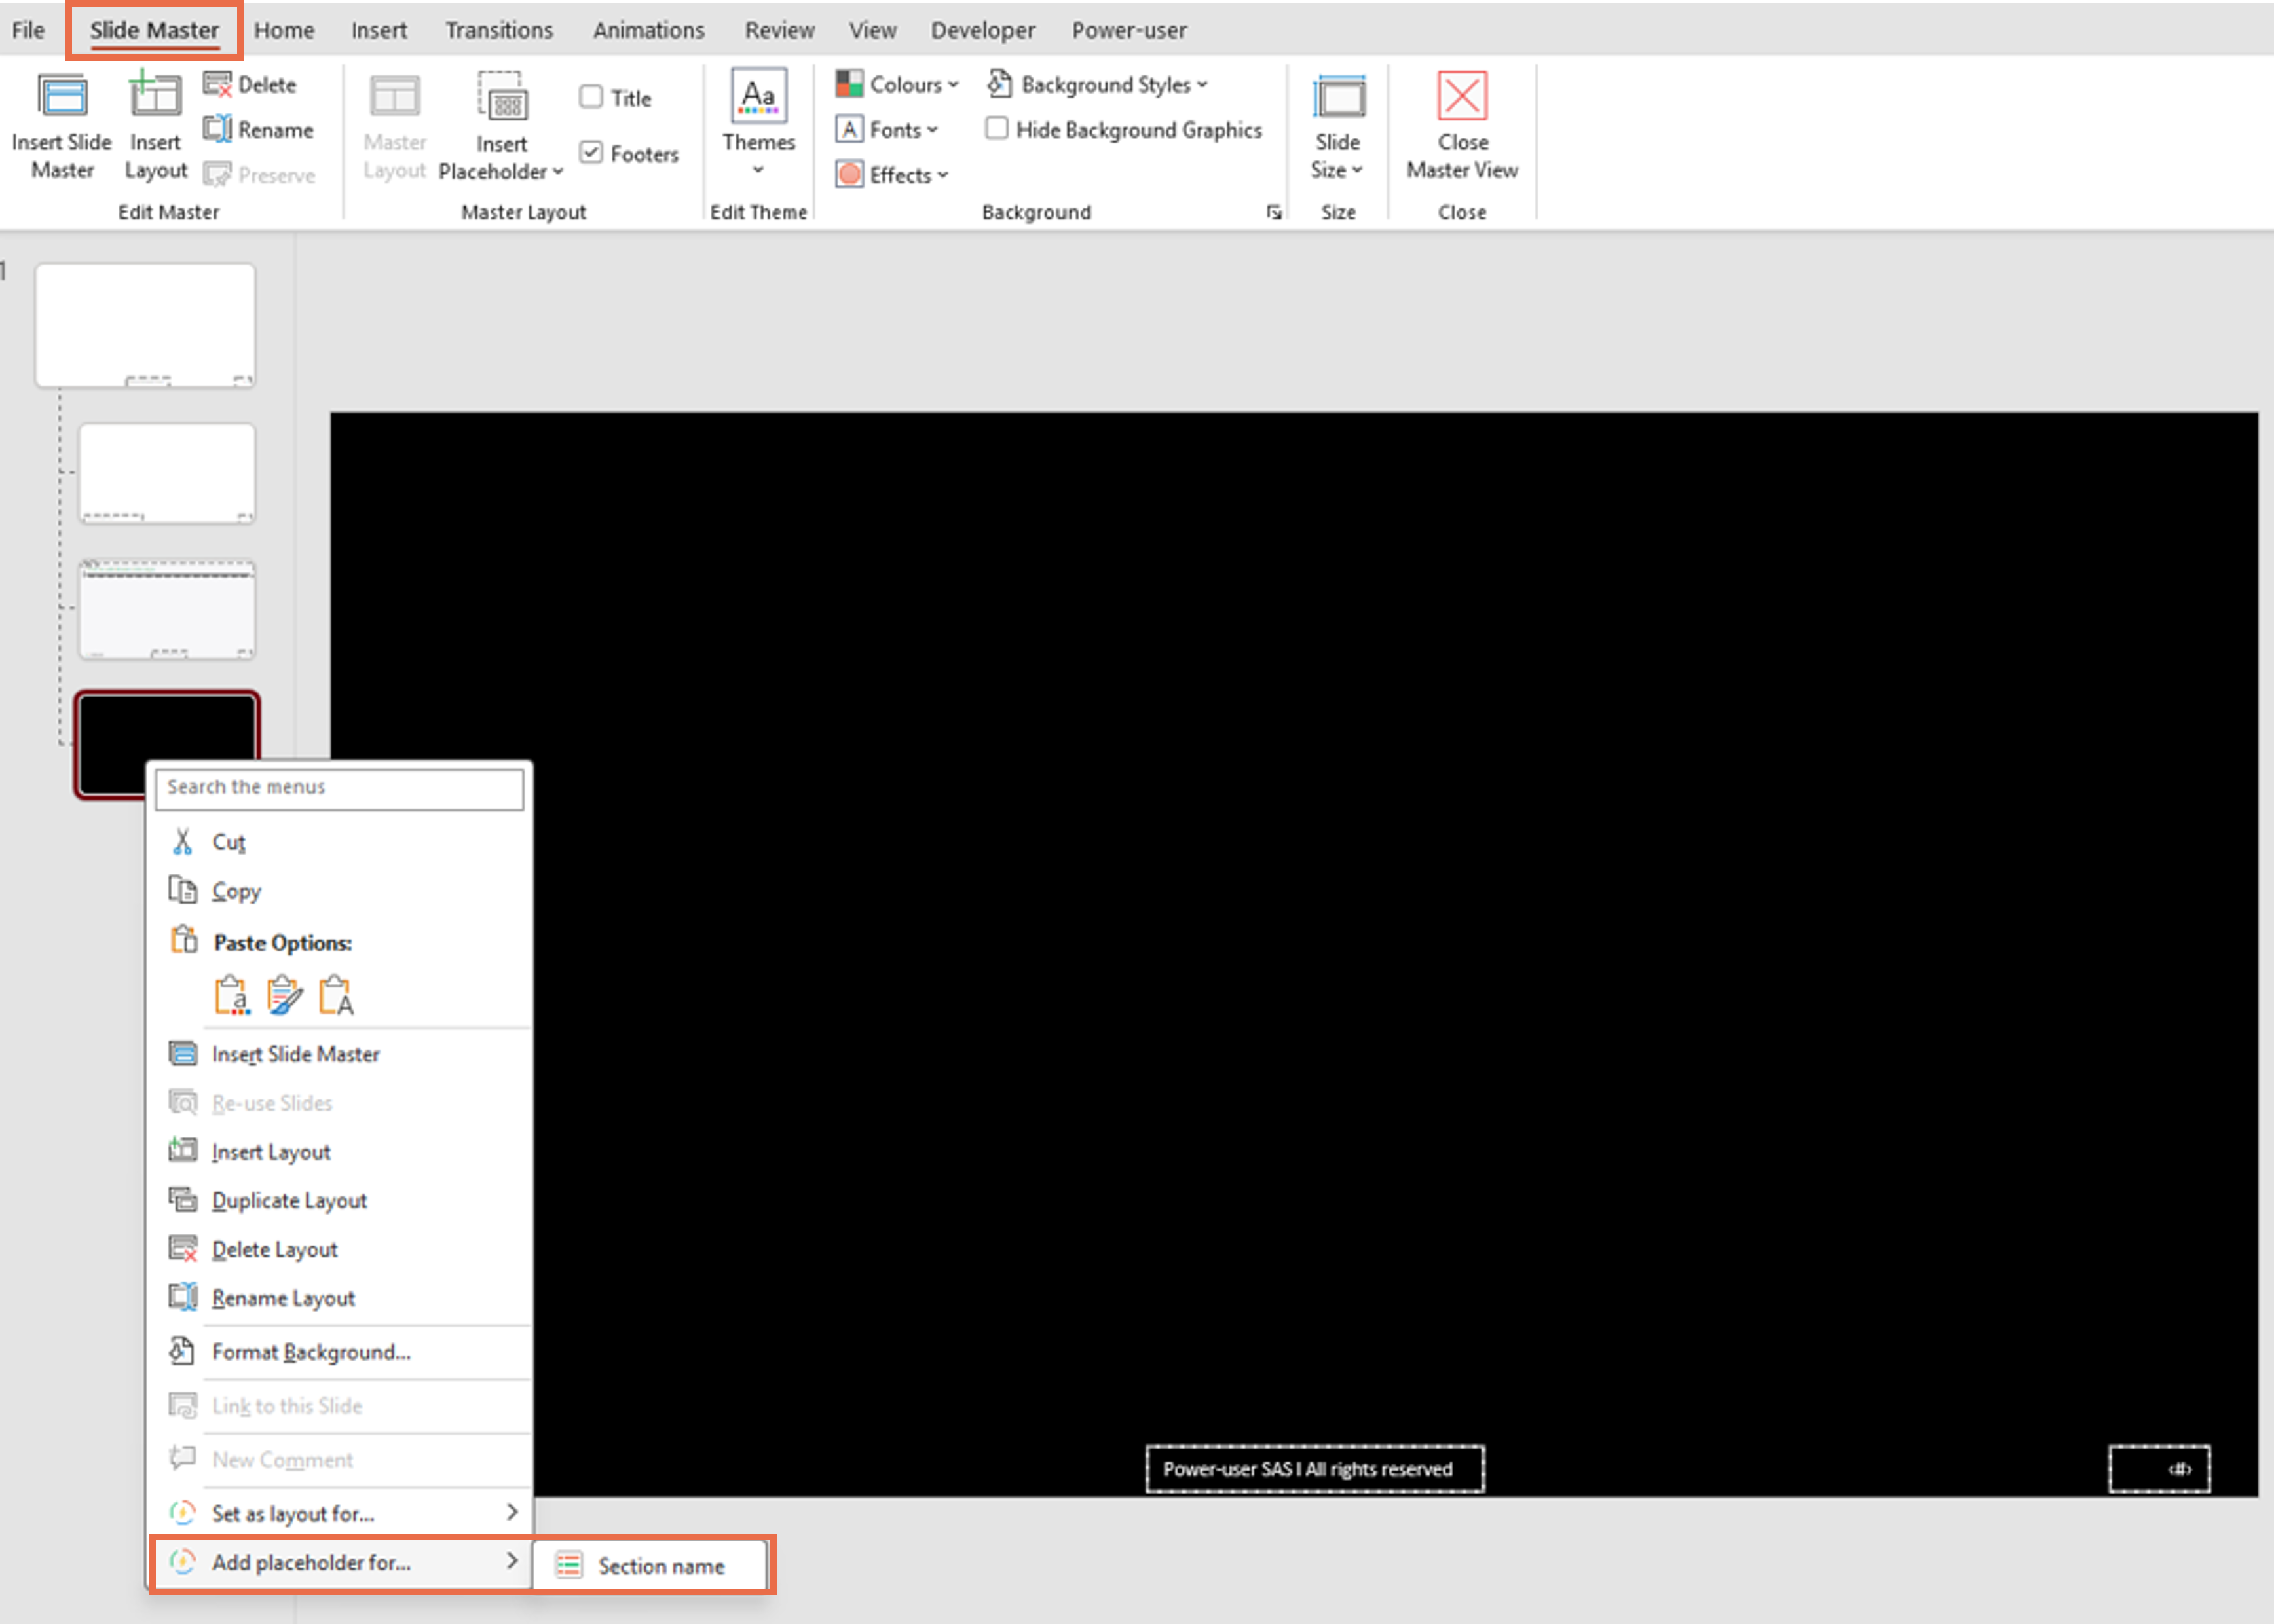
To manage this, go to your presentation's Slide Master View, then right-click a layout and hit "Add placeholder for" > "Section name". Position and format the placeholder as desired for this layout, then copy and paste it on layouts, adjusting the position and format for each layout.
When you update the Power-user Agenda, the format and position will adjust to the placeholders set for each layout.
The Power-user Agenda - but also Breadcrumbs - all contain hyperlinks to each section, so you can click it to go to the relevant part of the presentation. It remains clickable if you use "Save as" > "PDF", however the links will be removed if you use "Print" > "PDF" instead.
Was this article helpful?
That’s Great!
Thank you for your feedback
Sorry! We couldn't be helpful
Thank you for your feedback
Feedback sent
We appreciate your effort and will try to fix the article